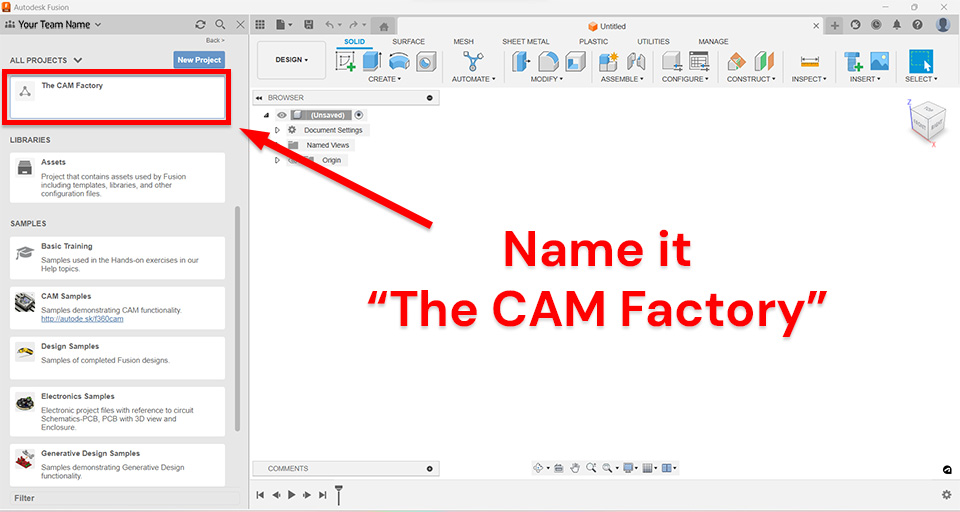
Step 1: Create a new project
Open Fusion, create a new project and name it "The CAM Factory".

Step 2: Create a folder structure in the new project
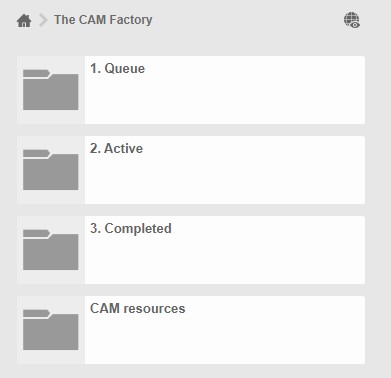
1. Queue
2. Active
3. Completed
4. CAM Resources
Add your fixture components to the CAM resources folder, such as:
- Vises
- Soft jaw blanks
- Fixture plates
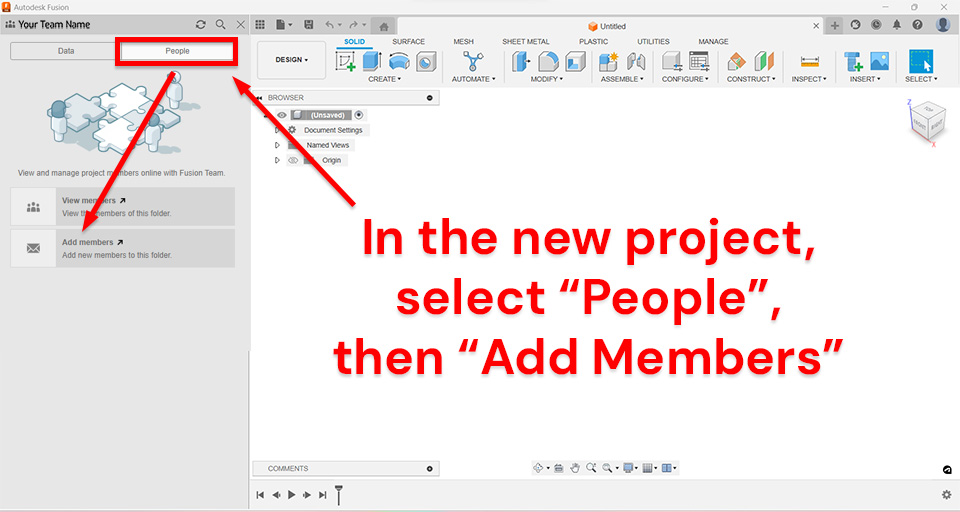
Step 3: Granting access and setting permissions.
3.1: Add a new member from the browser
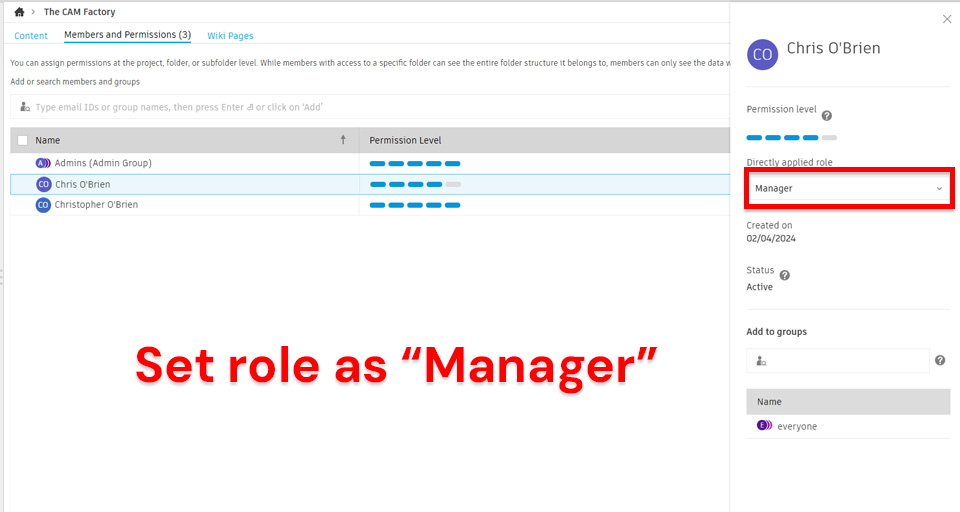
3.2: Search for chris@thecamfactory.com and click "Add". Then click into the new user to set permission level.
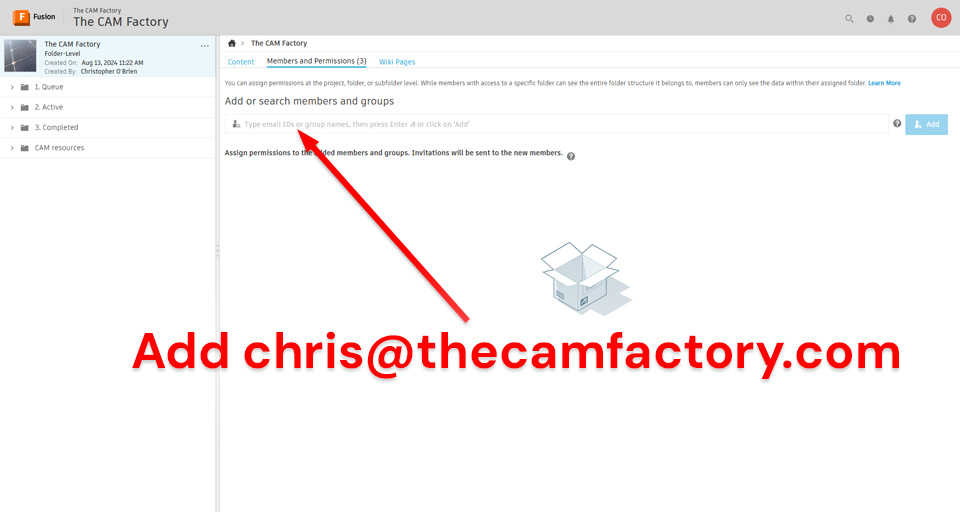
3.3: Set permission level to "Manager". This allows Chris to manage programmer access on a folder level. Nothing else in your hub will be accessible by anyone from The CAM Factory.
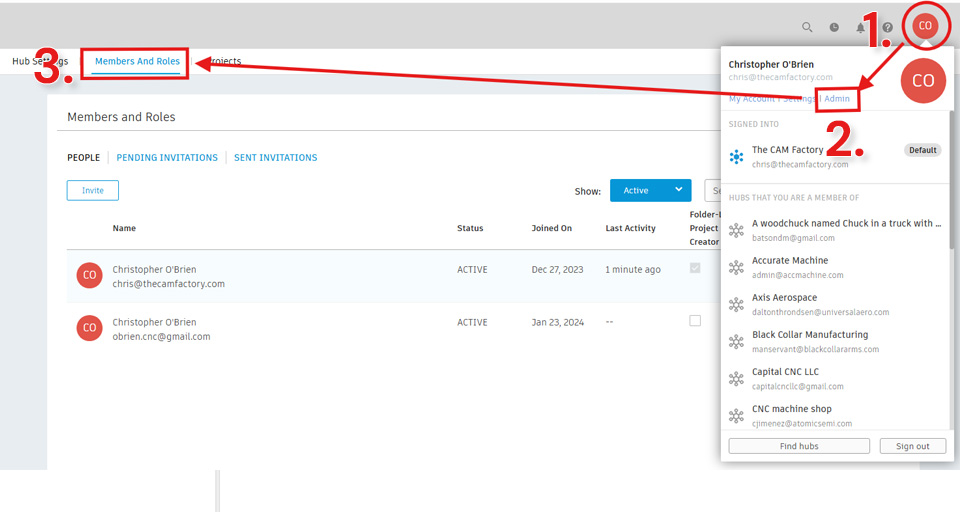
3.4: The CAM Factory will now have access to this project. Now, follow the numbered sequence below, navigating to the admin settings and then the Members and Roles.
3.5: Locate "chris@thecamfactory.com" under Members and Roles and assign the role "Hub Administrator". This will give Chris the ability to add programmers to The CAM Factory project.
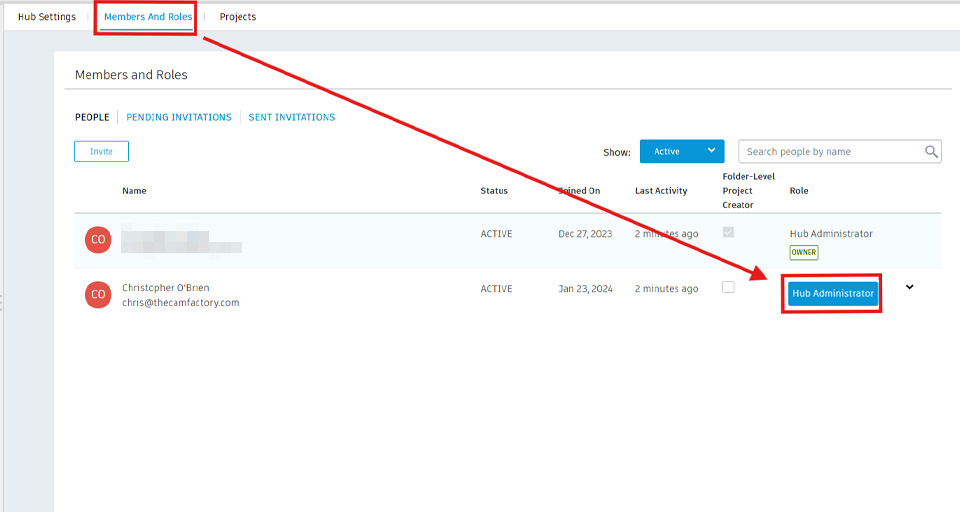
The CAM Factory will now have access to your tool libraries on the cloud.
3.6: Lastly, we want to auto-approve Hub Members with @thecamfactory.com email addresses. This ensures we can manage programmer access.
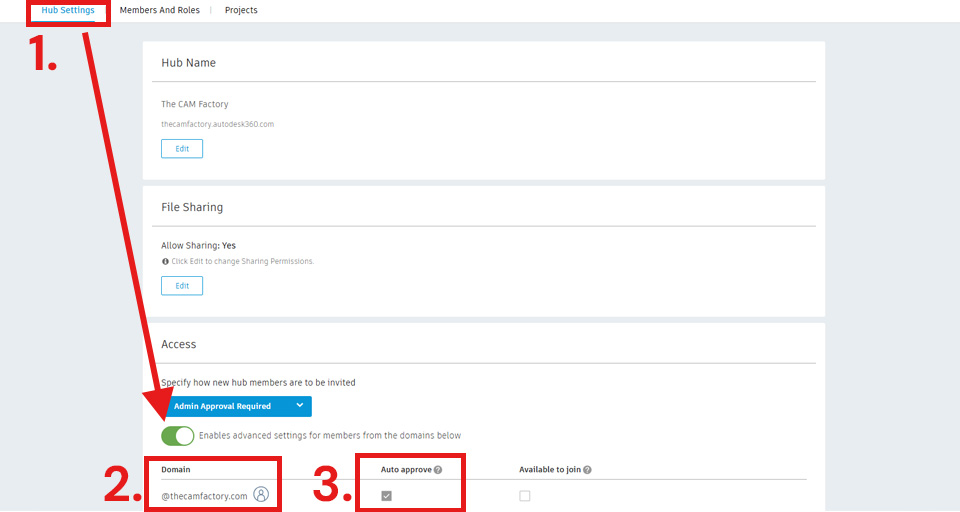
The CAM Factory admin may now add or remove CAM Factory employees to program your parts.
Step 4: Tool libraries on the cloud
In order for us to access your tool libraries, they need to be located on the cloud. Let's be sure you have cloud libraries enabled.
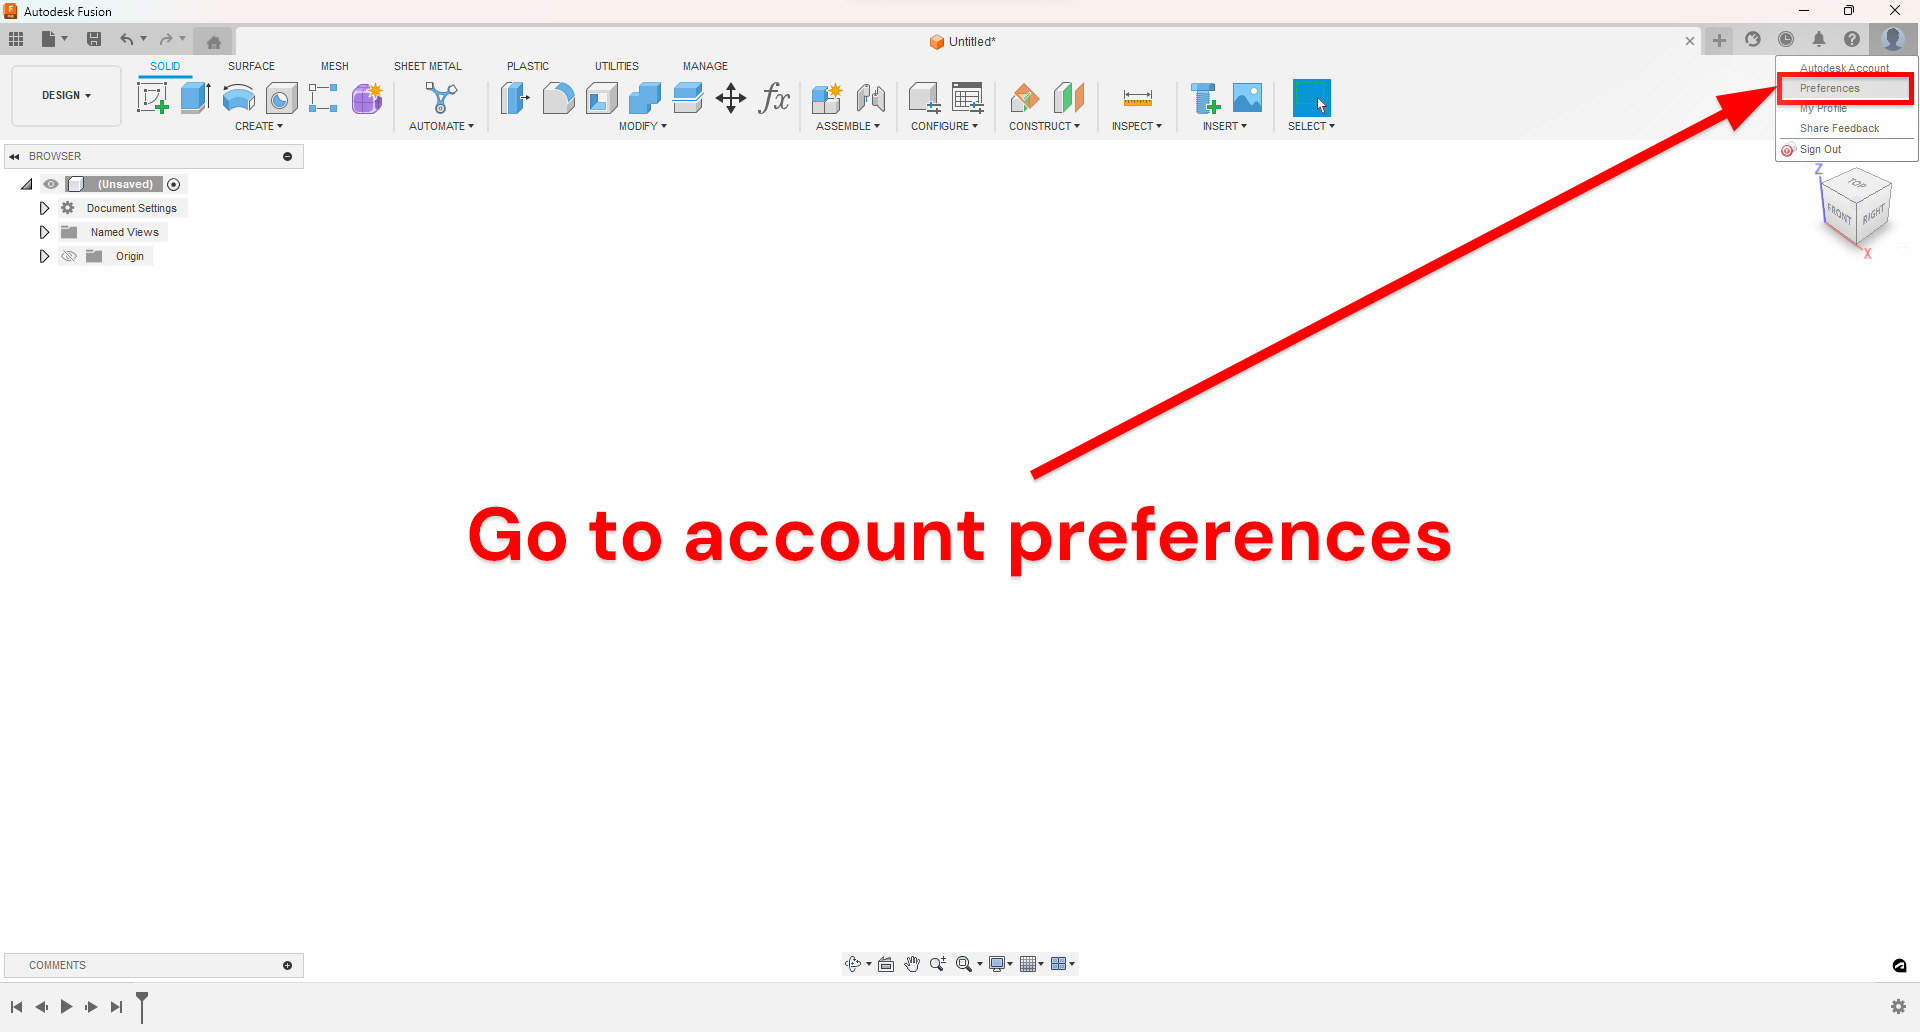
Go to account preferences, located within the user icon in the upper right corner of the Fusion app.
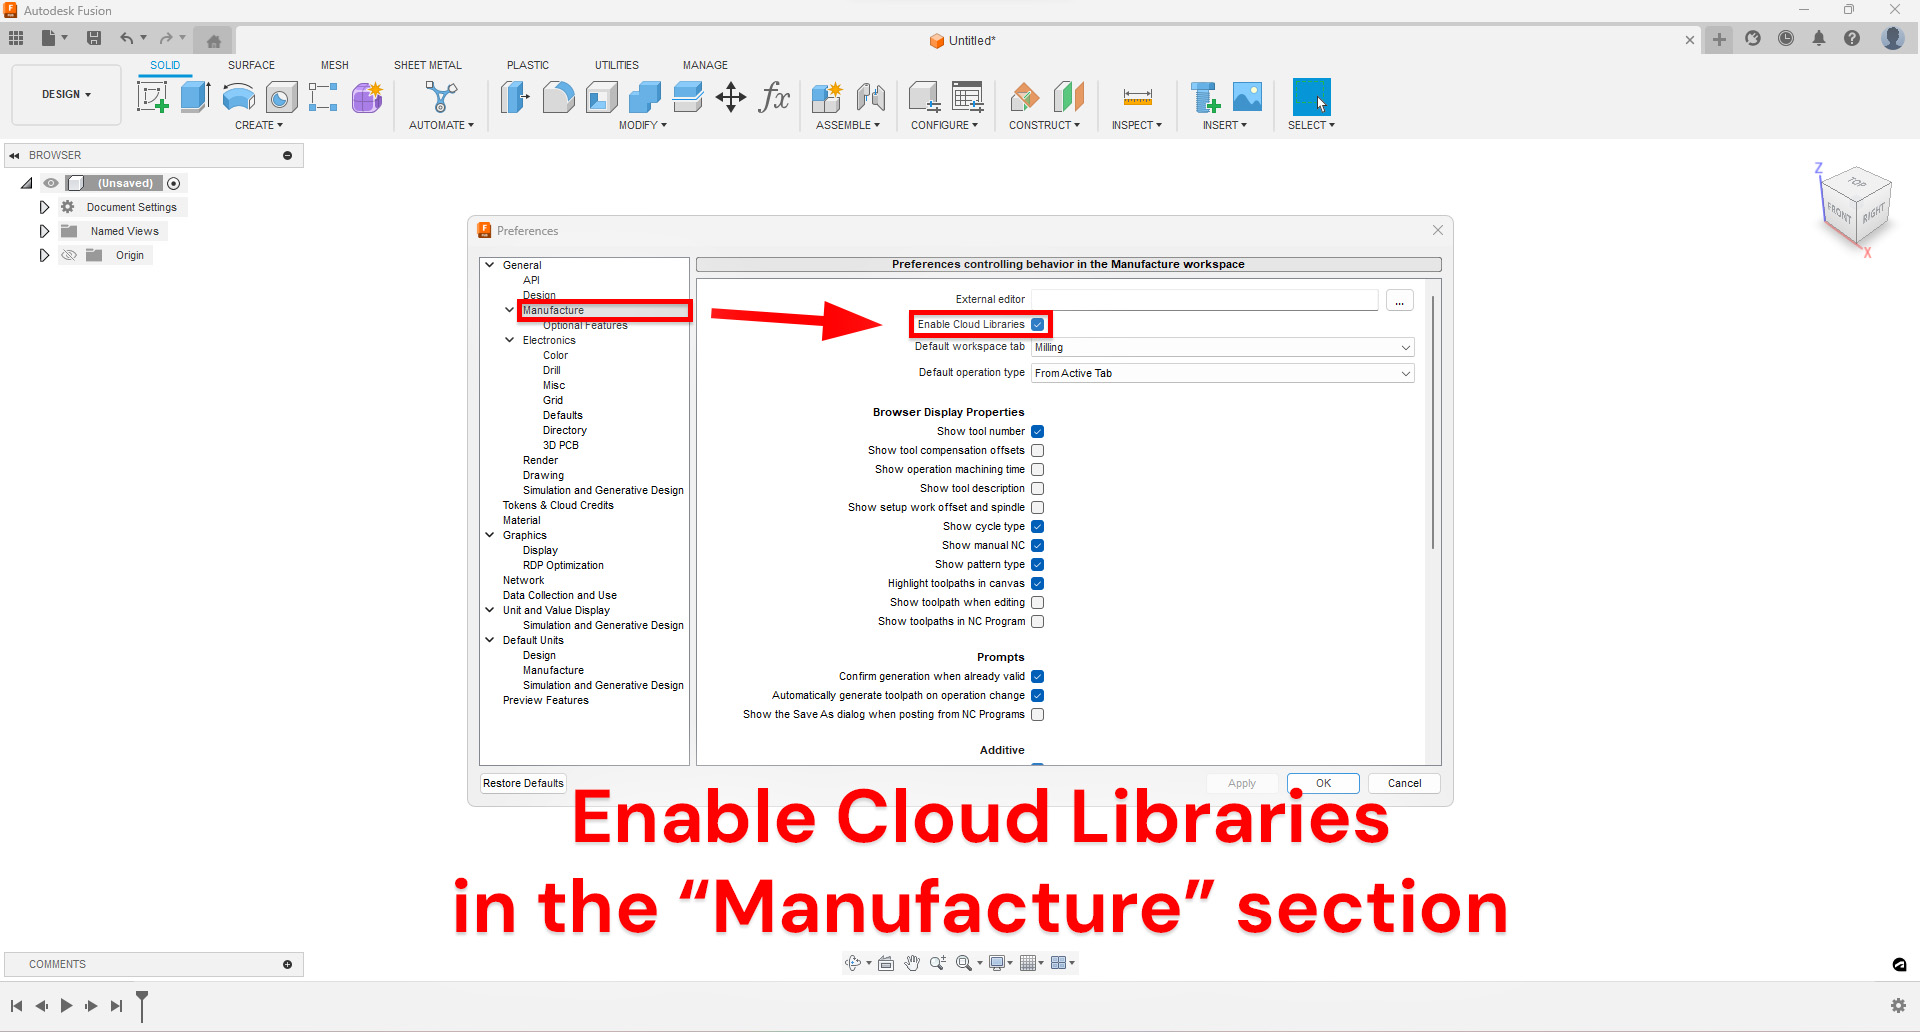
Click Manufacture and then check the box next to "Enable Cloud Libraries".
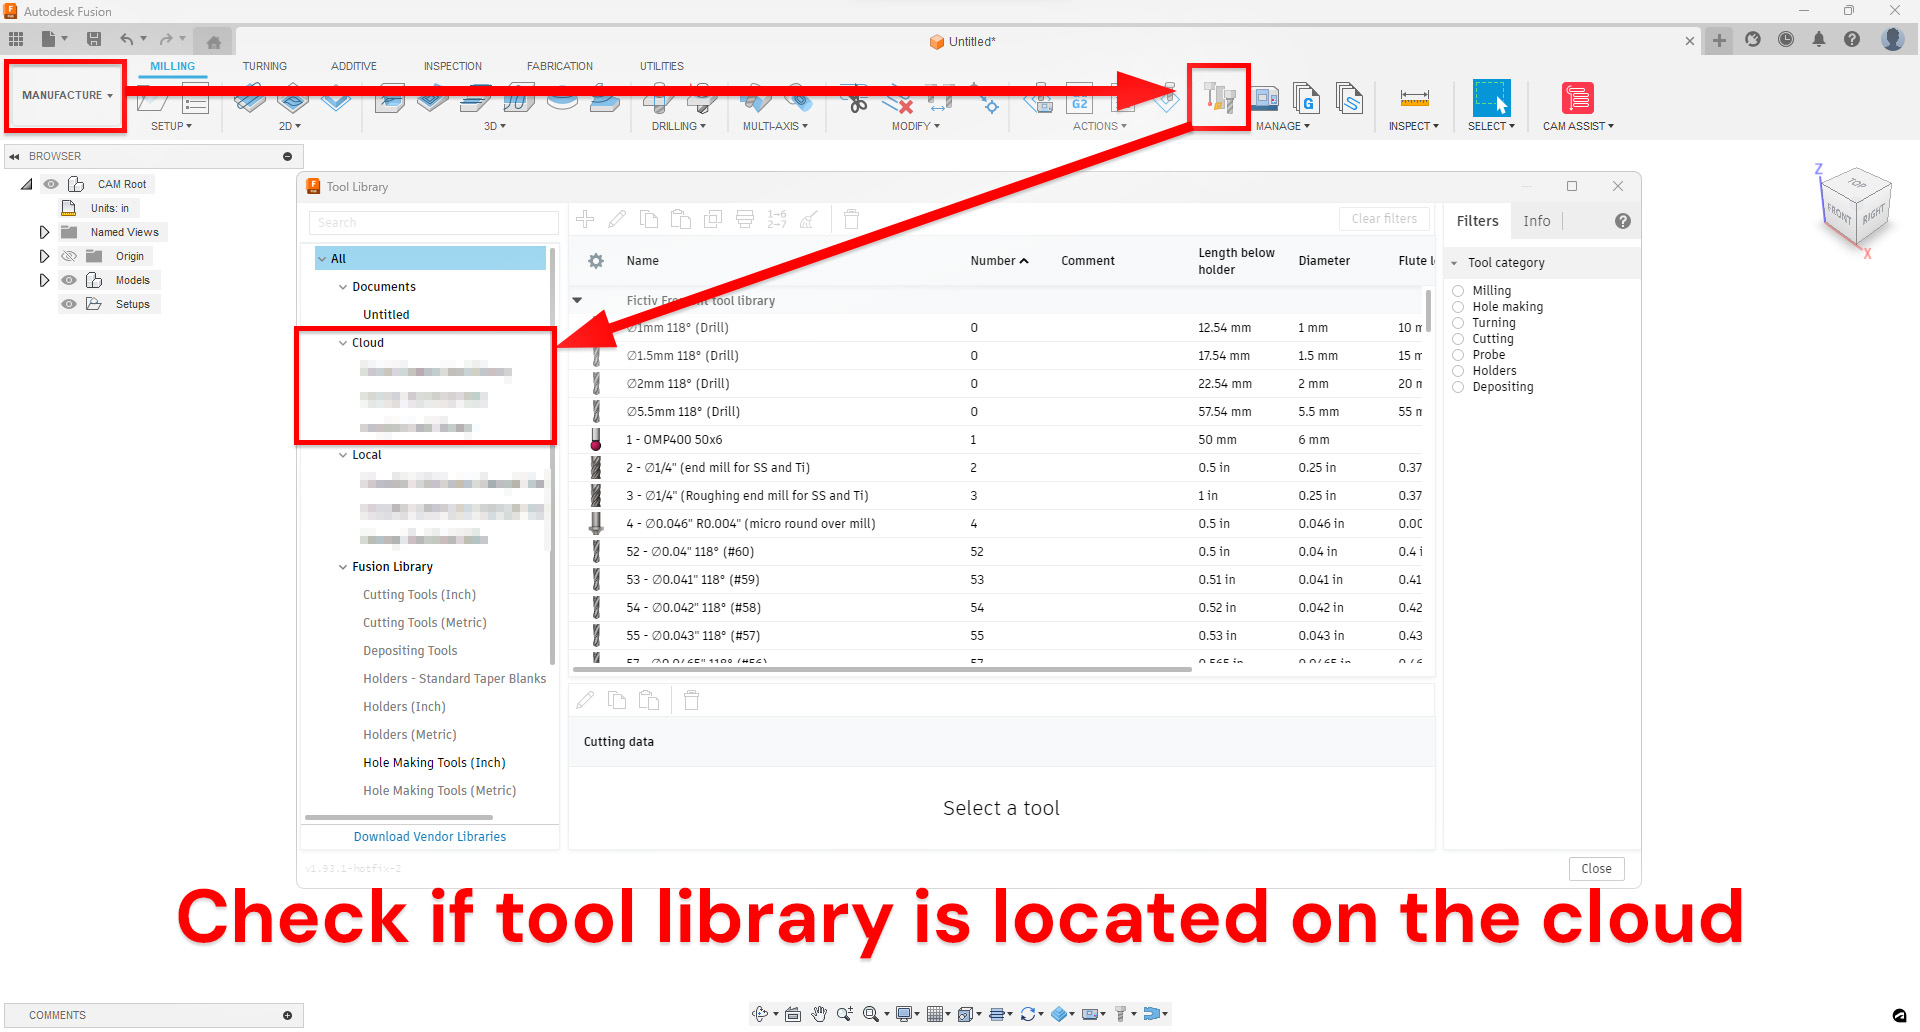
Check if the tool library we will be using to program your parts is currently available on the cloud.
If you need additional help importing a tool library to the cloud, please
visit this help page from Autodesk.That's it! Thanks for taking the time to set up Fusion for us. This goes a long way in ensuring that we can properly program your machines.